생성
UITableView 생성
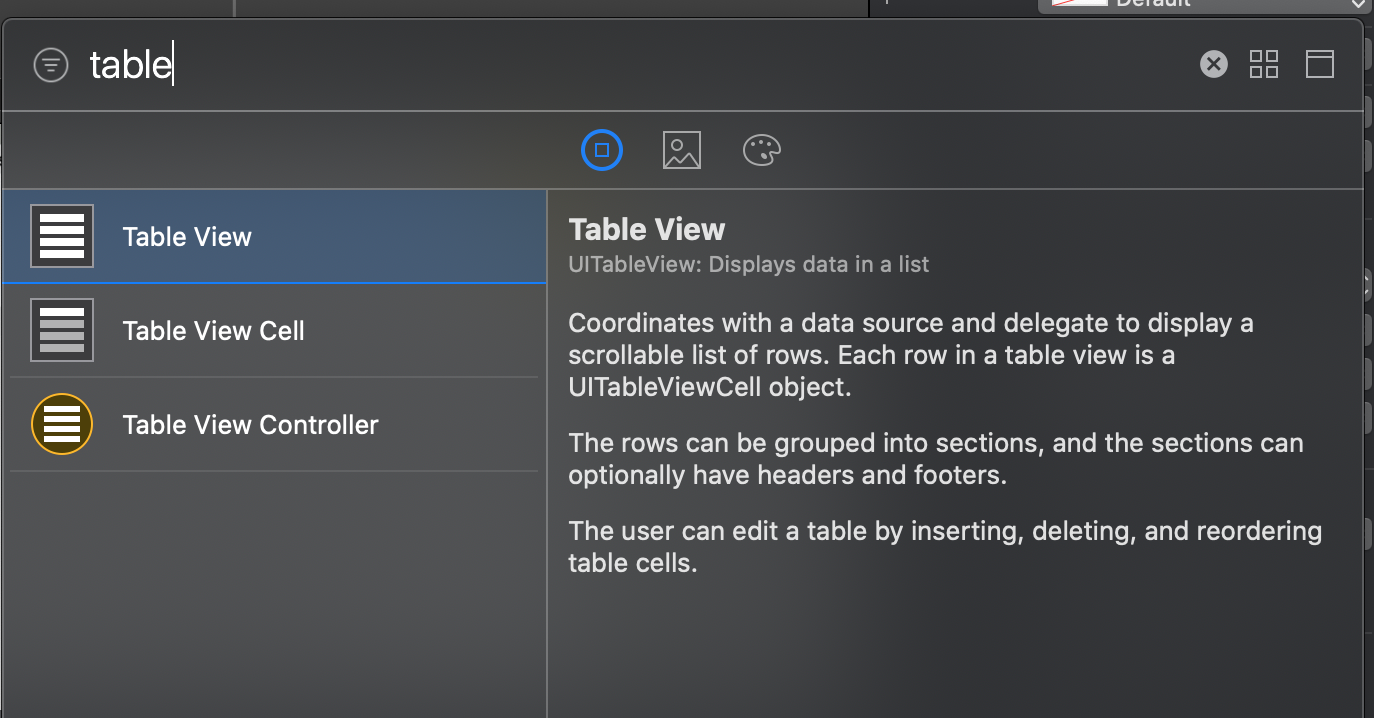
UITableView를 스토리보드에 추가한다.
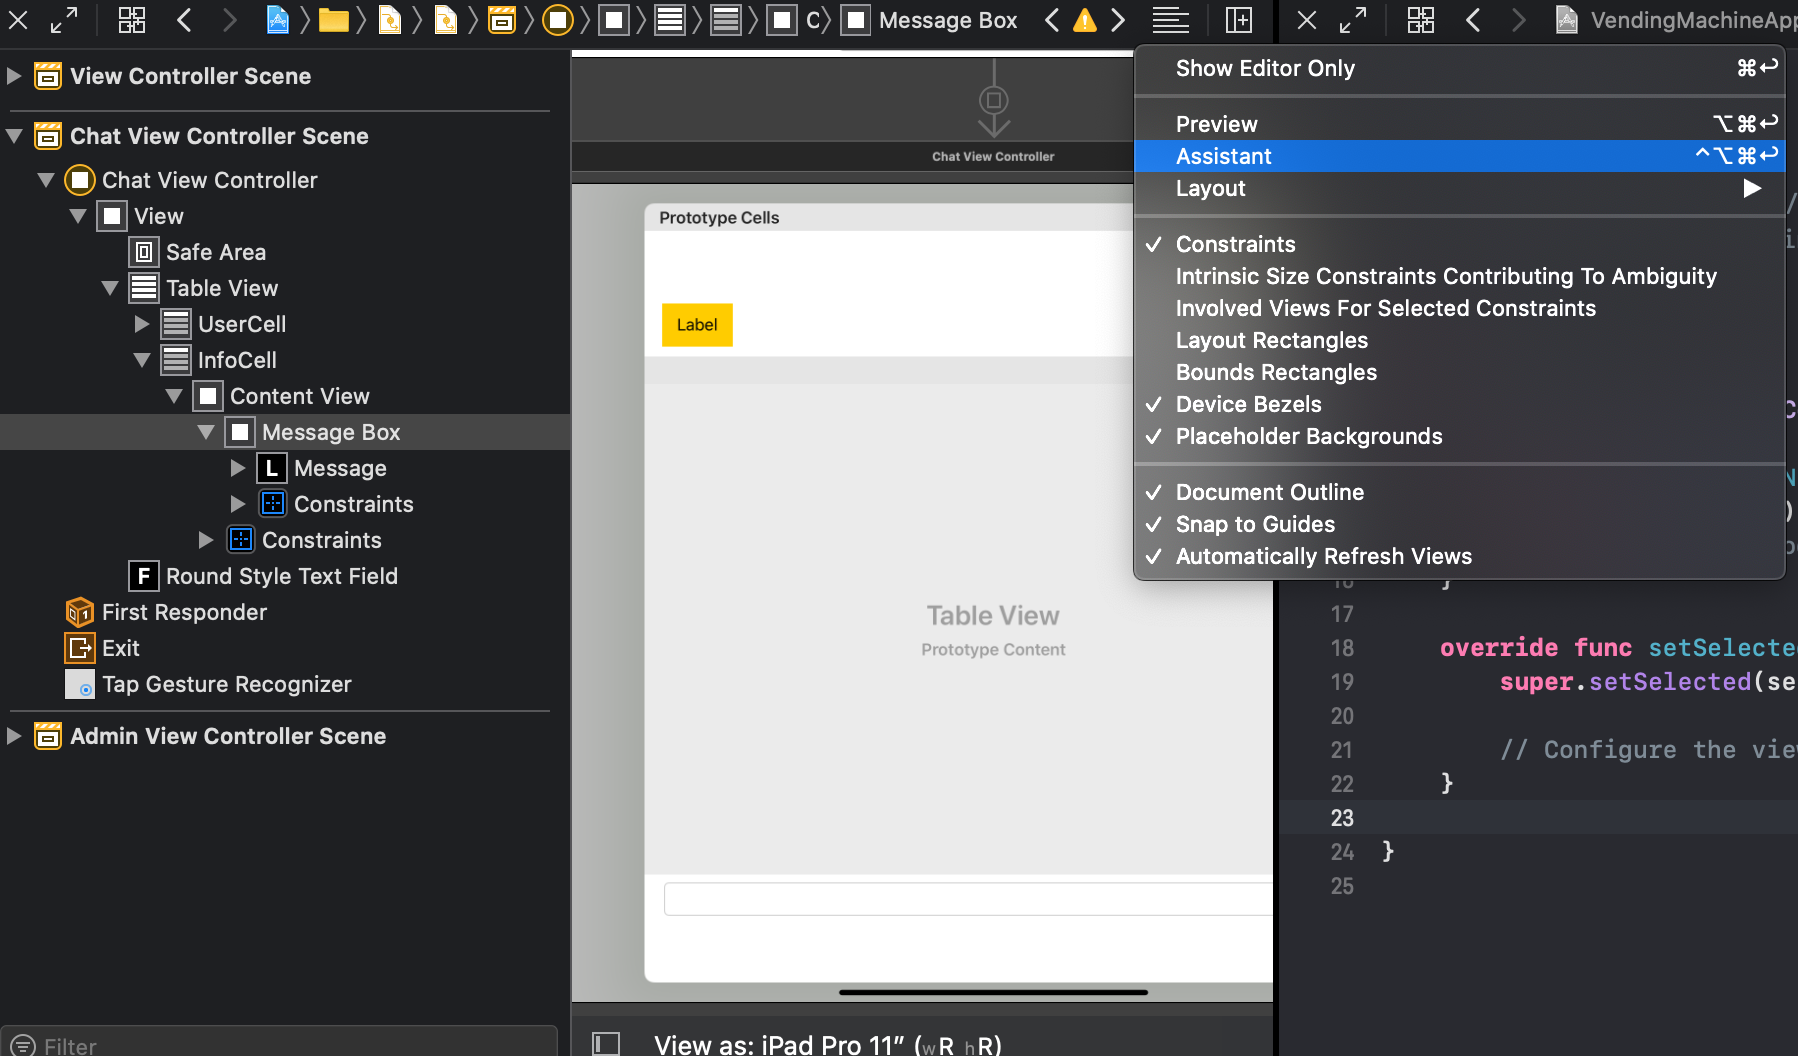
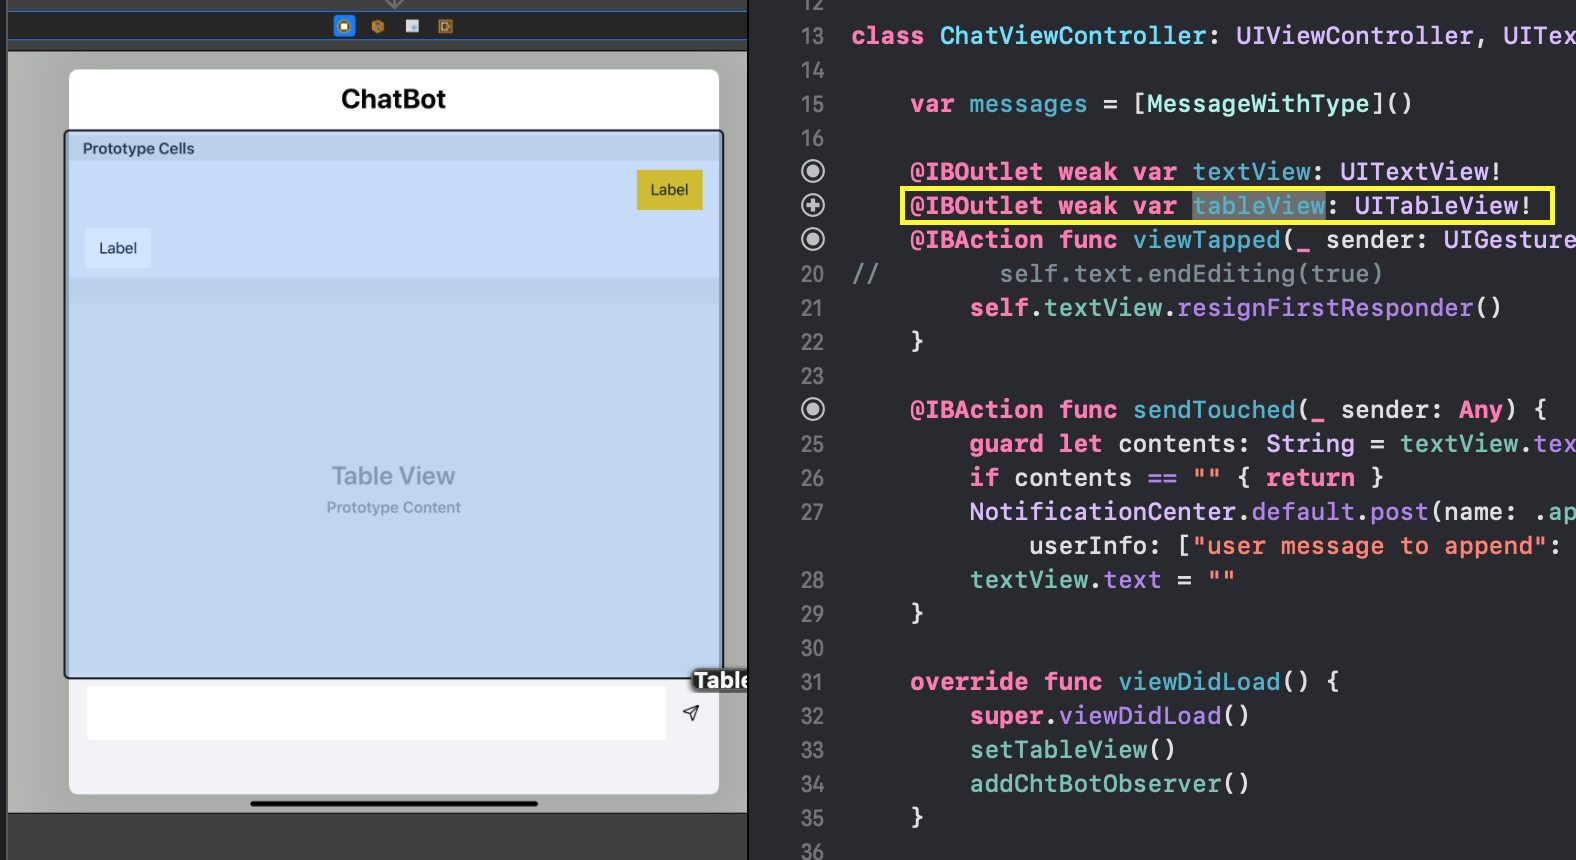
그다음 assistant를 열고 컨트롤러에 IBOutlet으로 연결한다.
Prototype Cell 생성
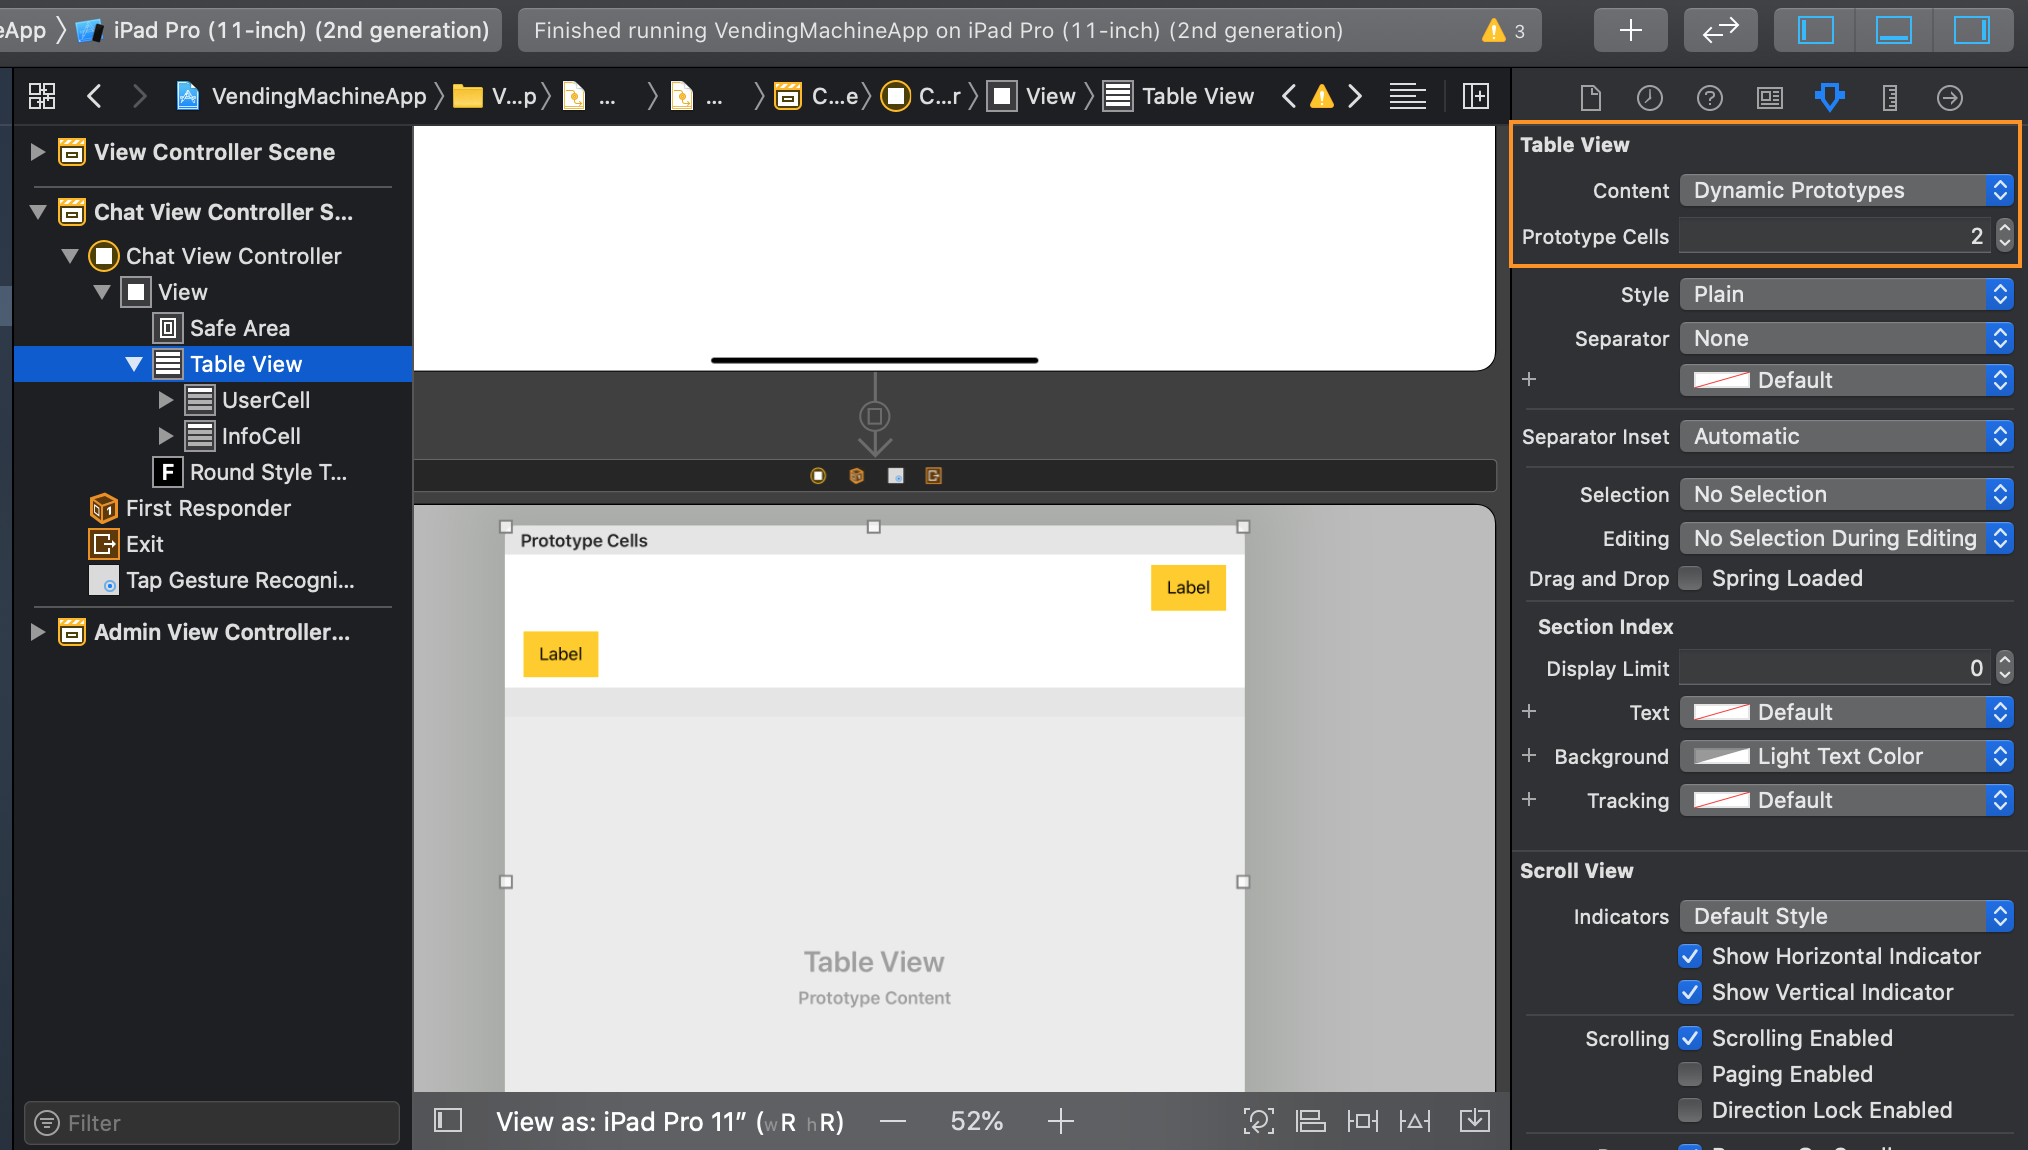
우측 상단의 뷰 인스펙터 중 Attributes를 선택 후 Prototype Cells의 수를 필요한 만큼 증가시킨다.
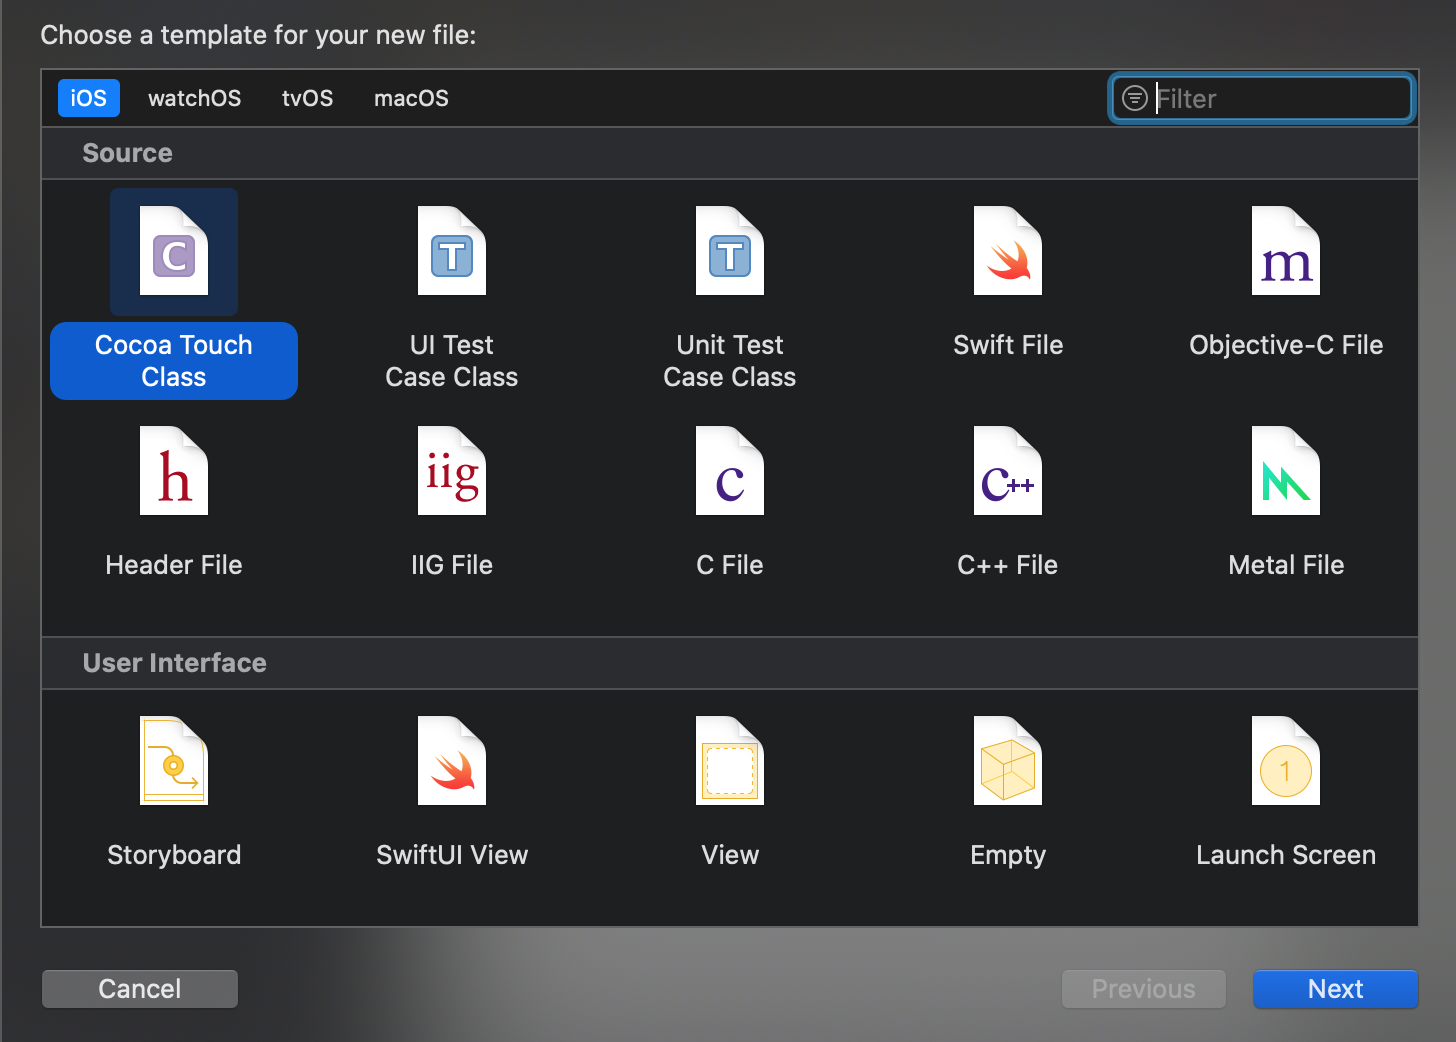
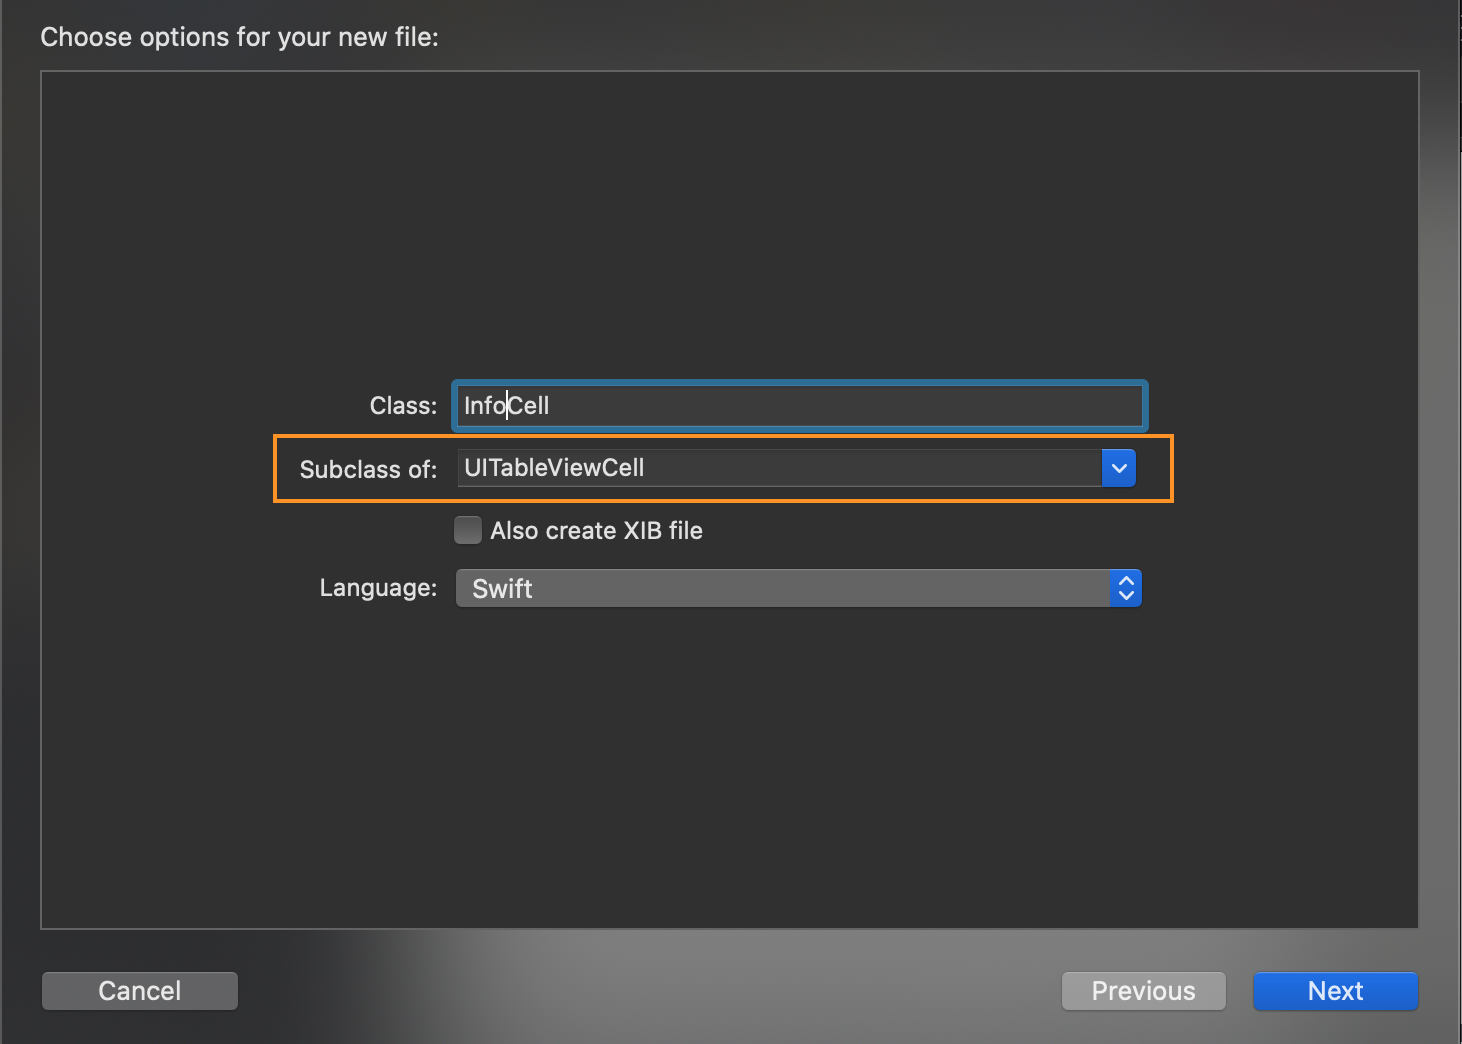
그다음 File-> New-> File...을 선택하여 스토리보드에 생성된 프로토타입 셀에 대한 뷰 파일을 생성한다.Cocoa Touch Class를 선택 후 subclass는 UITableViewCell을 선택한다. 기본적으로 생성한 셀은 커스텀이다.
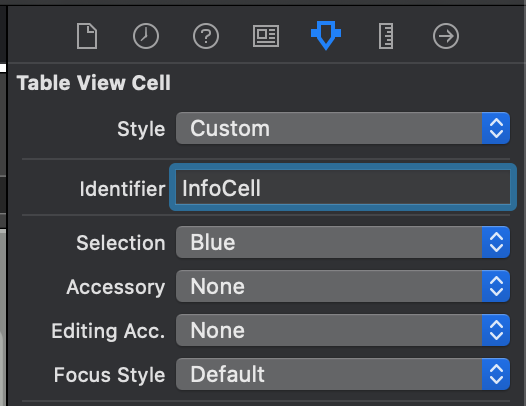
생성한 후 반드시 테이블 뷰 셀의 identifier를 지정해줘야한다.
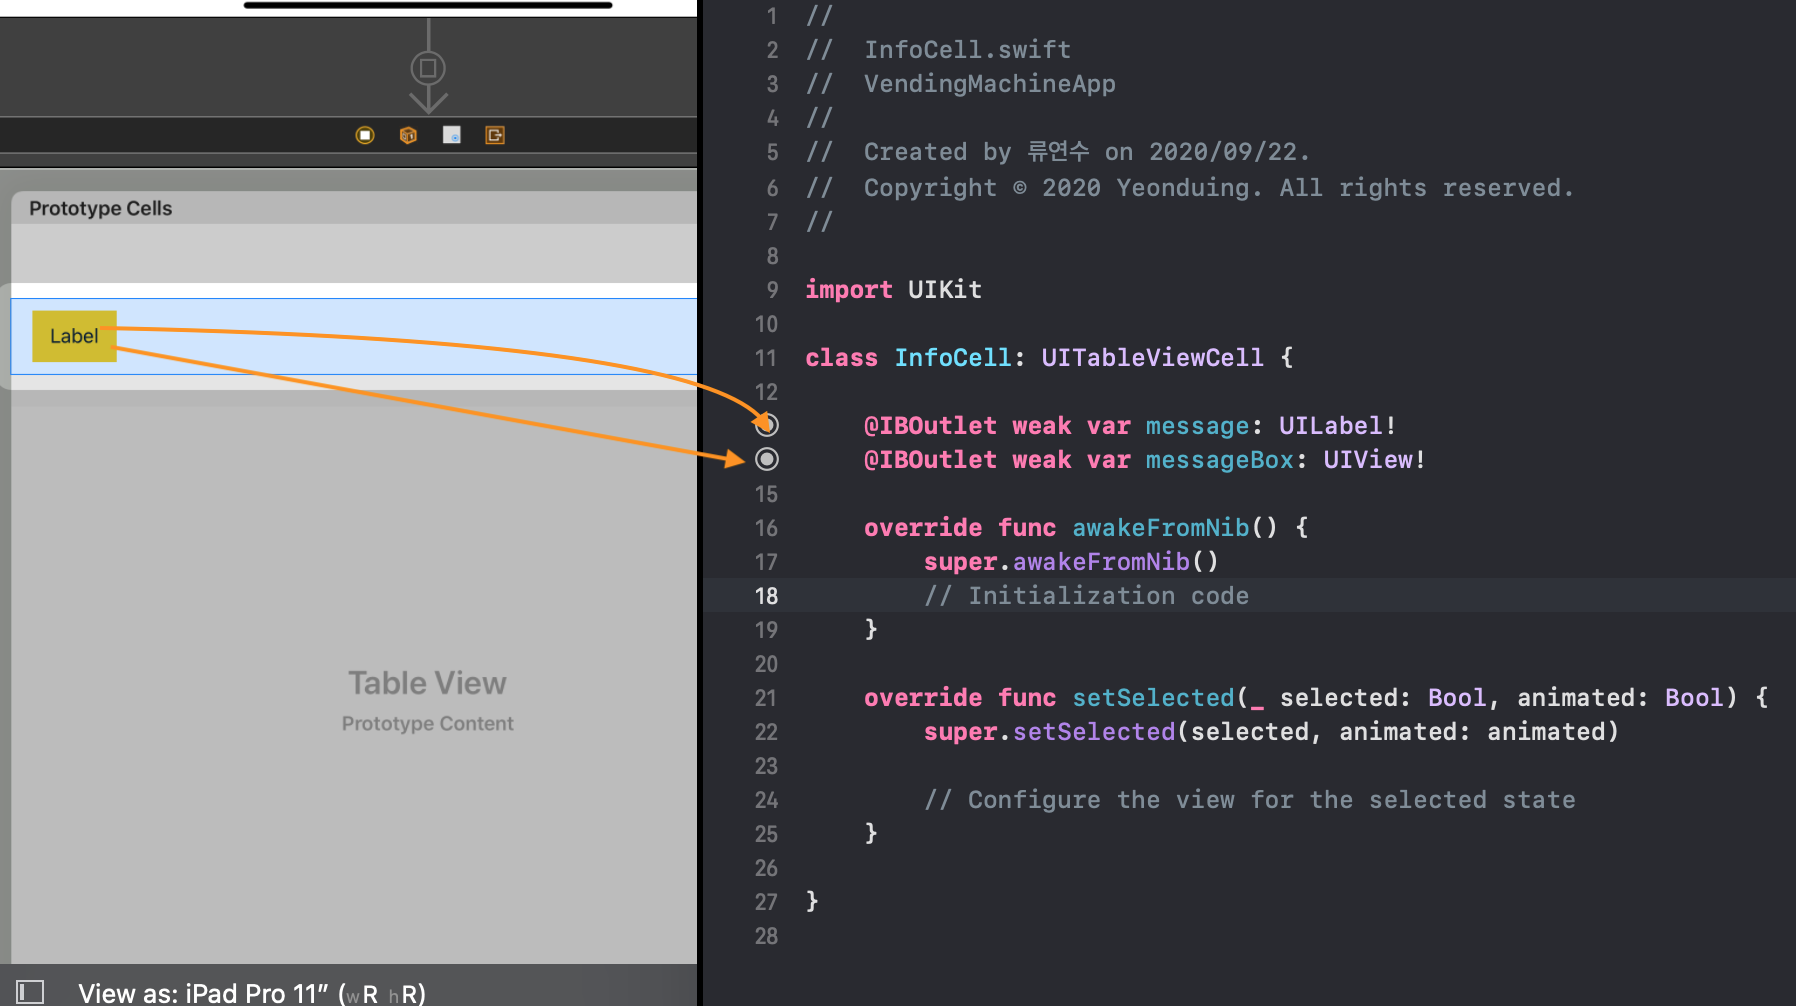
message에 해당하는 label과 messageBox에 해당하는 UIView를 위 이미지와 같이 스토리보드 상에 추가시키고 방금 생성한 UITableViewCell에 연결한다.
글자 크기에 맞춰 조정
테이블 뷰 높이 조정
우선 테이블 뷰 세팅을 다음과 같이 해야 한다.
func setTableView() {
    tableView.delegate = self
    tableView.dataSource = self

    // 디폴트 추정 높이
    tableView.estimatedRowHeight = 50
    // 셀의 크기에 맞춰 테이블뷰 높이 조정
    tableView.rowHeight = UITableView.automaticDimension

    textView.delegate = self
}
이때 아래의 메서드를 추가하면 안 된다. 아래의 메서드는 셀의 높이를 일정하게 유지하는 것이라 이 메서드가 존재하면 유동적으로 바뀌지 않는다.
func tableView(_ tableView: UITableView, heightForRowAt indexPath: IndexPath) -> CGFloat {
    return 70
}
셀 크기 조정
메시지가 일정 길이 이상이 될 때 아래로 내려올 수 있도록 다음과 같은 메소드를 만든다.
func setAutoLayout() {
// 사이즈가 텍스트에 맞게 조절.
message.sizeToFit()
// 여러줄로 나눠질 때 워드 단위로 끊어지도록 설정.
message.lineBreakMode = .byWordWrapping
// label이 여러줄을 가질 수 있도록 설정.
message.numberOfLines = 0
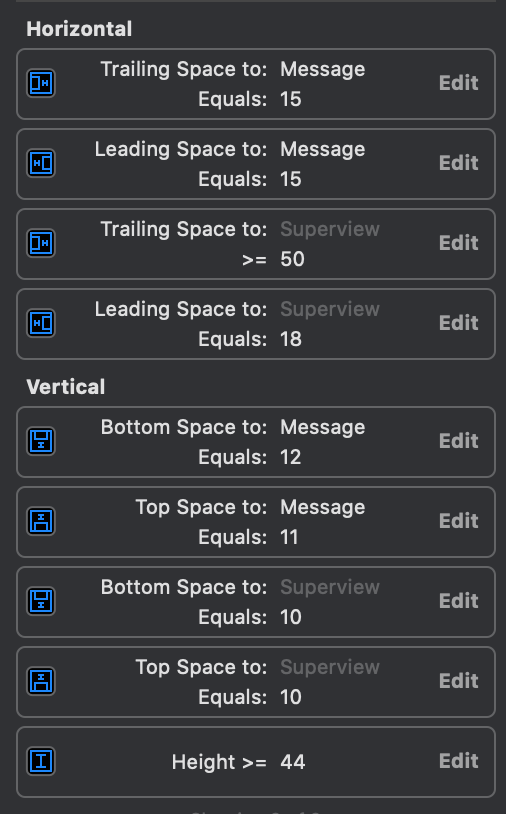
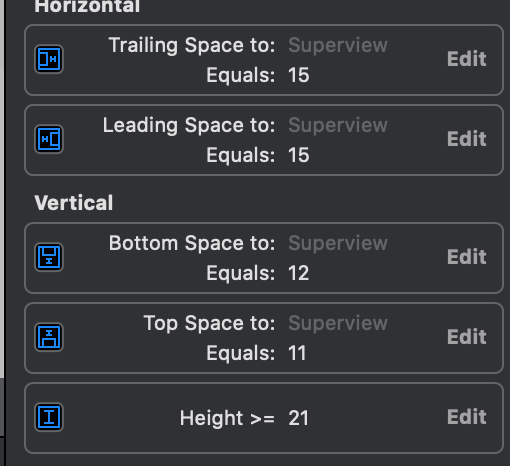
}메세지 박스의 경우 superView와 상하좌우 네 면 모두 오토 레이아웃이 걸려 있어야 한다. 메세지 박스와 메세지 라벨 모두 height가 유동적으로 변할 수 있도록 EqualTo 대신 GreaterOrEqualTo를 사용하도록 한다. 메세지 박스는 width 또한 일정하지 않으므로 superView와 trailing에 대해 유동적으로 바뀔 수 있도록 GreaterOrEqualTo를 적용한다.
사용
이런 식으로 UserCell과 InfoCell를 만들어 채팅 View로 활용할 수 있다.dequeueReusableCell은 셀을 재사용하는 것이다. 이때 withIdentifier는 셀을 생성할 때 지정한 identifier를 입력하면 된다.
func tableView(_ tableView: UITableView, cellForRowAt indexPath: IndexPath) -> UITableViewCell {
    switch messages[indexPath.row].type {
    case ChatBot.MessageType.user:
        let cell = tableView.dequeueReusableCell(withIdentifier: "UserCell", for: indexPath)
        guard let userCell = cell as? UserCell else {
            return cell
        }
        userCell.message.text = messages[indexPath.row].contents
        userCell.setAutoLayout()
        return userCell
    case ChatBot.MessageType.info:
        let cell = tableView.dequeueReusableCell(withIdentifier: "InfoCell", for: indexPath)
        guard let infoCell = cell as? InfoCell else {
            return cell
        }
        infoCell.message.text = messages[indexPath.row].contents
        infoCell.setAutoLayout()
        return infoCell
    }
//        return cell
}
추가 팁
채팅의 스크롤 아래로 내리기
다음의 코드를 추가하면 메시지를 입력할 때마다 해당 메시지가 보이도록 자동으로 스크롤을 내리게 할 수 있다. 해당 메소드는 메세지가 추가될 때마다 불리도록 해야 한다.
func scrollLastOfTableView() {
    // First figure out how many sections there are
    let lastSectionIndex = self.tableView.numberOfSections - 1

    // Then grab the number of rows in the last section
    let lastRowInLastSection = self.tableView.numberOfRows(inSection: lastSectionIndex) - 1

    let indexPath = IndexPath(row: lastRowInLastSection, section: lastSectionIndex)

    self.tableView.scrollToRow(at: indexPath, at: .bottom, animated: true)
}
func updateMessage() {
tableView.reloadData()
scrollLastOfTableView()
}메시지 박스 경계선 둥글게 만들기
다음과 같이 뷰 인스펙터에 추가해주면 스토리보드로도 UIView Component의 border를 수정할 수 있다.
| Key Path | Type | Value |
|---|---|---|
| layer.masksToBounds | Boolean | True |
| layer.cornerRadius | Number | 10 |

한 번에 버튼 여러 개 등록
동일한 기능을 하는 버튼에 대해 같은 메서드에 연결할 수 있다. 각각의 버튼을 구분하기 위해 tag 속성을 활용하였다.
여러 버튼을 한 번에 등록하는 방법을 몰라서 엄청 헤맸다...
좋은 방법은 아니라고 하니 가능하면 다른 방법을 사용하는 것을 추천한다.

참고
'iOS > iOS' 카테고리의 다른 글
| iOS) Build input file cannot be found 에러 해결 (0) | 2020.11.07 |
|---|---|
| iOS) NavigationBar의 Border 지우기 (0) | 2020.10.09 |
| iOS) NSCoding과 Archive를 통한 데이터 저장 - (2) (0) | 2020.09.20 |
| iOS) NSCoding과 Archive를 통한 데이터 저장 - (1) (0) | 2020.09.20 |
| iOS) 레이아웃(1) - 인터페이스 빌더 (0) | 2020.08.23 |


